
Last updated November 17, 2026
 Shaker
 Modern flat-panel
 Two-tone cabinets
 KraftMaid
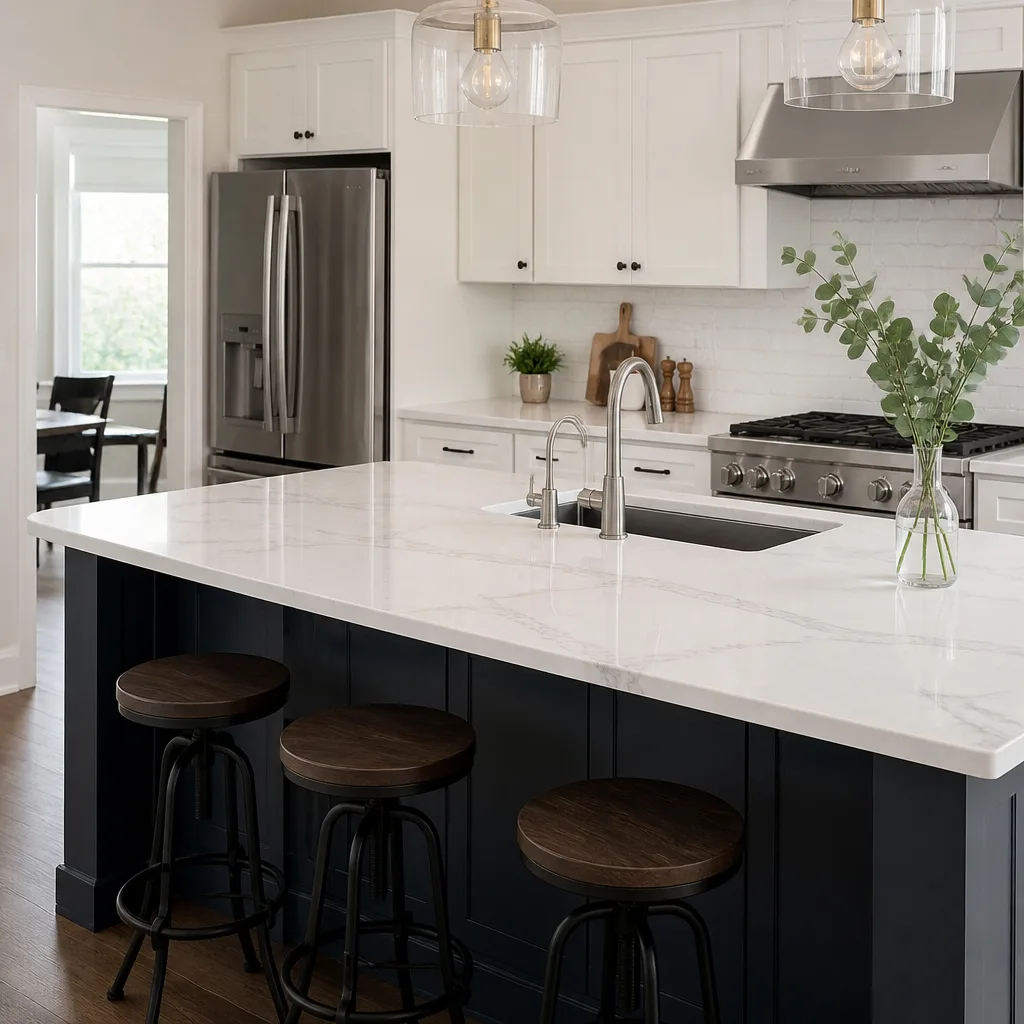 Cambria quartz
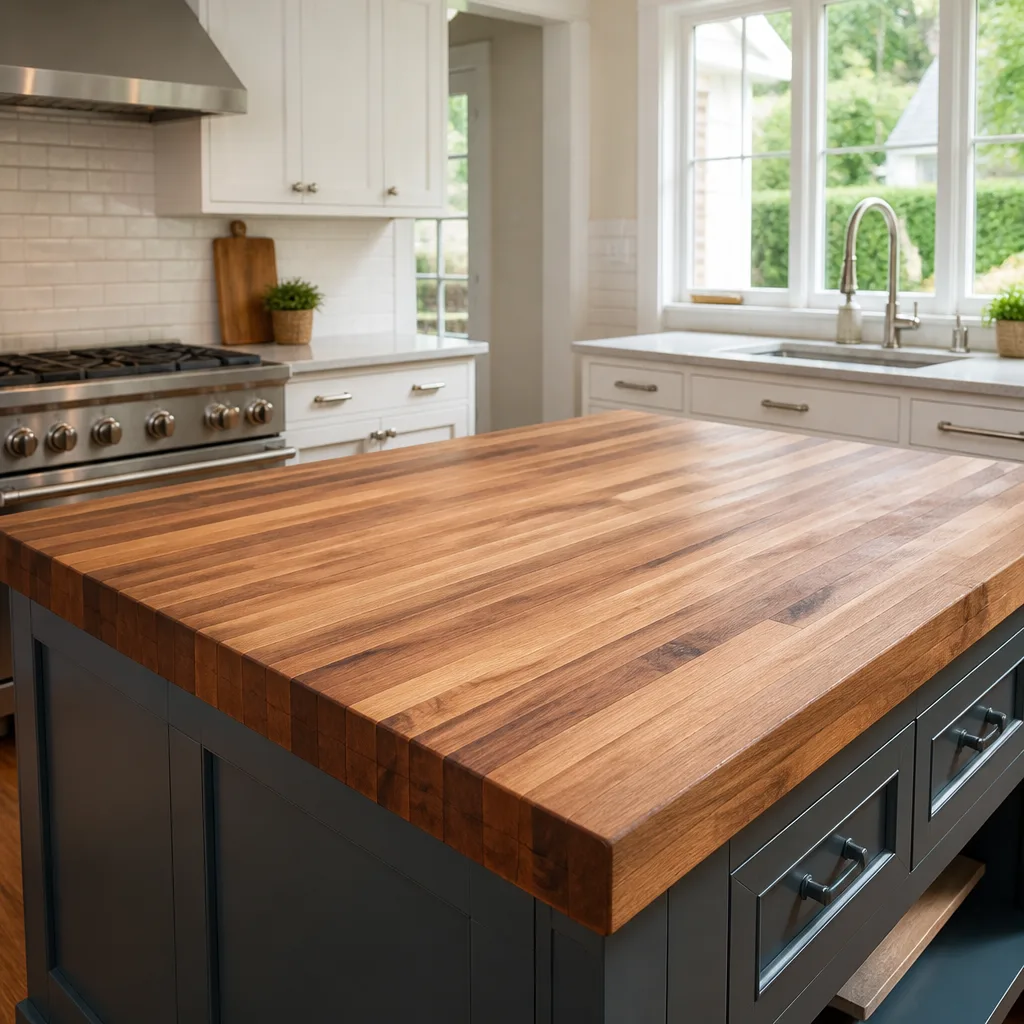 Butcher block
 Open shelving
Free design consultation - KraftMaid and Wellborn cabinet lines, Cambria and Silestone surfaces, and every tier from refacing to full custom laid out side by side
Kitchen Remodeling Maintenance Schedule: What to Do and When
Cambria doesn’t need sealing. Ever. But the caulk line under a Kohler undermount sink in that same kitchen needs a look every 11 months, or you’re staring at cabinet box rot by year three. The mistake most Henderson homeowners make is treating every premium material the same. A quartz countertop and a wood cabinet door live in completely different maintenance worlds, and a newly remodeled kitchen here has a predictable calendar shaped by the desert climate and the specific brands installed. This guide lays out that calendar – month by month for the first year, then by material for the long haul – so your kitchen still looks sharp a decade in.
Quick Answer
A remodeled kitchen in Henderson needs a light monthly once-over, a deeper inspection every 3-4 months, and material-specific care at set intervals: cabinet hinge re-torquing twice a year, sink caulk inspection every 11 months, aerator and disposal flushing every 2-3 months, and countertop care dictated by the actual surface brand. Cambria needs no sealing, while Silestone and Caesarstone have their own manufacturer guidance that should be followed over anything a salesperson promises.
Styles & brands we work with
- Shaker
- Modern flat-panel
- Two-tone cabinets
- KraftMaid
- Cambria quartz
- Butcher block
- Open shelving
Table of Contents
- Your First-Year Calendar After a Henderson Kitchen Remodel
- Surface-Specific Maintenance: Cambria vs. Silestone vs. Caesarstone
- Cabinet Care: Hinges, Finish, and UV in the Desert
- Water Chemistry, Drains, and Disposal Intervals
- Fixtures: Kohler, Moen, and Blanco Care
- What Voids a Cabinet Warranty and What Doesn’t
- Common Mistakes to Avoid
- When to Call a Professional
Your First-Year Calendar After a Henderson Kitchen Remodel
The first year is when a kitchen settles, and Henderson’s climate makes that settling more active than in most places. Indoor humidity swings with the seasons, summer heat pushes cabinet doors against their hinges, and the dry air of winter pulls wood down slightly. A cabinet installation done right accounts for this, but the seams still need watching. Here’s how we’d pace the first twelve months.
- Month 1: Check every cabinet hinge and drawer glide. New installs can loosen as the wood acclimates. Wipe down all surfaces with the manufacturer’s recommended cleaner.
- Month 2: Inspect the caulk line where the countertop meets the backsplash and where an undermount sink meets the stone underside. Run a finger along the sink rim feeling for soft spots.
- Month 3: Flush the faucet aerators and the disposal for the first time. Henderson’s water runs hard, and mineral scale starts building early.
- Month 4-5: Re-torque the cabinet hinges. Check the door alignment against the frame; a slight rub means an adjustment, not a defect.
- Month 6: Second caulk inspection. Look at the toe-kick and the cabinet-to-wall joints.
- Month 9: Second aerator and disposal flush. Check under the sink for any moisture staining on the cabinet floor.
- Month 11: The critical caulk check at the sink line. This is the interval that separates a kitchen that lasts from one that doesn’t.
- Month 12: Full walkthrough. Hinges, caulk, drains, finish – a one-hour sweep that resets the calendar for year two.
That first-year rhythm matters because it catches the problems that only show up in the early settling window. Once a kitchen is through its first year, the schedule relaxes to a steady semi-annual and annual rotation. If you’re planning a kitchen remodeling project, ask your contractor to walk you through this calendar at the end of the job – the best time to set the baseline is the day you get the keys.
Surface-Specific Maintenance: Cambria vs. Silestone vs. Caesarstone
Not all quartz behaves the same, and the biggest disservice we see is a homeowner told that “quartz is maintenance-free” then using an abrasive cleaner on a surface that didn’t need one. Each of the three premium lines we install carries its own care guidance, and matching the cleaner to the surface protects the finish for the long haul.
- Cambria: Non-porous and needs no sealing, ever. Warm water, mild soap, and a soft cloth handle daily cleaning. Avoid bleach, and skip anything abrasive at the seam.
- Silestone: Non-porous with a factory finish that resists staining. Routine cleaning with a pH-neutral product is enough. Heavy-duty degreasers can dull the sheen over time, so read the label.
- Caesarstone: Non-porous and sealed at the factory. Mild detergent and water is the standard. Avoid leaving standing water near the edge or seam for extended periods.
What none of these brands require is annual sealing. If a salesperson tells you otherwise, that’s a red flag. What they all benefit from is heat protection: never set a hot pan directly on quartz, because thermal shock can crack the surface at a seam. Use a trivet. That single habit protects more countertops than any cleaner on the market.
What the manufacturers actually require vs. what salespeople promise
Promotional language often compresses a real care sheet into a slogan. The truth is more workable: these surfaces are low-maintenance, not zero-maintenance. A quarterly wipe-down of the seams and a check for chips near the sink edge is the real requirement. If you choose your surface from three premium lines during design, ask for the care sheet with the sample. The best time to know the material’s rules is before it’s installed.
Cabinet Care: Hinges, Finish, and UV in the Desert
Henderson’s thermal cycling is the single biggest wear factor on cabinetry. Indoor temperatures swing between daytime highs and cool desert nights, and that expansion and contraction travels through the wood framing, the door panels, and the hinges. Re-torquing hinges twice a year – once at the start of summer and once at the start of winter – keeps doors aligned and stops a small adjustment from becoming a stripped screw hole.
Finish fading near window runs
The UV index here is unforgiving. Cabinets set beside a south- or west-facing window take the most sun, and over several years that exposure can fade or shift a finish more than the rest of the run. If your layout puts cabinets in direct light, look at the finish lines built for sun: both KraftMaid and Wellborn offer finishes with stronger UV resistance within their painted and stained lines, and we’ll point you to those options at the selection stage rather than after the fade appears.
What you can do regardless of brand:
- Rotate decorative items on open shelving so they don’t leave a sunshadow.
- Keep blinds or shades partially drawn on the brightest exposures during peak afternoon hours.
- Wipe finished surfaces with a damp cloth and mild soap – no silicone polish, which builds and yellows.
- Check the toe-kick and the cabinet-to-wall joints twice a year for swelling or separation.
Cabinet boxes want stable humidity more than anything. If your HVAC runs hard in summer, the kitchen stays comfortable and the wood stays put. Our technicians have up to 14 years of experience installing KraftMaid and Wellborn cabinetry, and that experience is why we flag the sun exposure at the design stage instead of the five-year mark.
Water Chemistry, Drains, and Disposal Intervals
Henderson’s water runs on the hard side compared to the national average, and that changes the maintenance interval for everything downstream of the faucet. Mineral scale builds faster inside aerators, on faucet finishes, and inside the disposal, so the national advice of “flush annually” comes up short here. Every two to three months is our recommendation for the first year, then quarterly after that.
- Flush aerators: Unscrew the aerator at the tip of the faucet, rinse the screen under running water, and soak it briefly in white vinegar if you see white crust. Reinstall by hand.
- Clean the disposal: Grind a handful of ice cubes, then run cold water for a minute. A half-cup of baking soda and vinegar cleans the chamber and kills odor between deep cleans.
- Check the drain seal: Under the sink, look at the disposal mounting and the trap. Any moisture or discoloration means the seal needs attention.
- Inspect the P-trap: Henderson’s hard water can leave residue in the trap over years. A periodic check catches slow drains before they clog.
Skip bio-friendly disposals of coffee grounds, grease, and fibrous vegetables. Those don’t break down, and they push the cleaning interval down to monthly. The hardest water in a home usually shows up first in a white ring on a faucet finish – that’s your cue to check the aerator.
Fixtures: Kohler, Moen, and Blanco Care
Fixtures take some of the most abuse in the kitchen and get the least attention. A Kohler faucet, a Moen spray head, and a Blanco sink all come with their own finishes and care requirements, and matching the cleaning product to the finish is what keeps them looking new through years of daily use.
- Kohler: Follow the finish-specific care – polished chrome takes a soft cloth and mild soap, while brushed and vibrate finishes want a non-abrasive cleaner. Avoid harsh scouring pads.
- Moen: Pull-down and pull-out spray heads benefit from periodic descaling; Henderson’s mineral content accelerates scale build-up, so soak the head in vinegar every few months.
- Blanco sinks: Composite and stainless models have their own cleaning guidance. Mild dish soap and warm water handle daily use; avoid abrasive pads on composite finishes.
The under-sink cabinet floor is where most water damage starts, and it almost always traces back to a fixture. A loose supply line, a worn O-ring, or a spray-head connection that worked its way loose all show up as a damp cabinet floor long before they show up as a visible leak. That’s why the sink cabinet gets a light check every quarter. When we install Kohler, Moen, and Blanco fixtures alongside the cabinets and countertops, we spec each piece for the finish in the design so the cleaning routine is one consistent set of habits, not three different product chases.
What Voids a Cabinet Warranty and What Doesn’t
Premium cabinetry carries manufacturer-backed limited lifetime warranties from the brands – KraftMaid and Wellborn both stand behind their lines – but a warranty claim goes nowhere without documentation. The single most common reason a claim stalls isn’t a defective door; it’s a lack of proof that routine maintenance was done or that the issue wasn’t caused by misuse. Knowing the difference protects you.
What typically voids a claim
- Using abrasive cleaners, bleach, or silicone polish on finished surfaces.
- Hanging heavy items from door panels or overloading drawers beyond rated weight.
- Exposing cabinets to sustained moisture, such as a known slow leak left unrepaired.
- Modifying or drilling into cabinet boxes outside the manufacturer’s installation guidance.
- Removing or altering hardware in ways the manufacturer doesn’t approve.
What’s typically covered and what documentation helps
Hinge failure, delamination, and finish defects within the warranty term are the standard covered items. To support a claim, keep the brand model numbers, the original paperwork, and a simple maintenance log noting when hinges were adjusted and caulk was inspected. A dated photo of the sink caulk line and cabinet interior each year is the kind of small habit that turns a stalled claim into an approved one. If you’re unsure which brand or line you chose, ask us and we’ll pull it from your project records – we install KraftMaid and Wellborn cabinetry, and knowing the specific line matters when you file.
Common Mistakes to Avoid
- Sealing a quartz countertop that never needed it. Cambria, Silestone, and Caesarstone are non-porous and factory-sealed. Applying a sealer does nothing useful and can leave a film.
- Treating the sink caulk line as a once-and-done item. In Henderson’s climate, the caulk contracts and loosens faster than in more humid regions. Inspect at month 11 and every six months after, or risk cabinet box rot.
- Skipping the aerator and disposal flush because “it still drains fine.” Hard water builds scale invisibly and reduces flow long before it backs up.
- Using silicone-based polish on cabinet finishes. It builds over time and yellowing is hard to reverse. Mild soap and water is the right call for every finish line.
- Ignoring UV fade on cabinets near a bright window. The sun does more damage than any cleaner. Check the finish carefully at design selection, not after a season of exposure.
- Treating all three countertop brands identically in cleaning. Each has its own finish sheen and care guidance. Use the care sheet that comes with the surface, not a generic cleaner.
- Tossing the warranty documentation after install. A cabinet claim without model numbers and a maintenance log goes nowhere. File the paperwork with the brand and model in your records.
When to Call a Professional
Most kitchen maintenance is routine, but a few situations call for a trained eye. A soft spot in the cabinet box under the sink, a crack at a quartz seam, a cabinet door that won’t stay aligned despite hinge adjustments, or a finish defect that keeps returning after a reinstall all point to a problem a homeowner’s toolkit can’t fix. Water staining on the cabinet floor that reappears after cleaning means a leak worth investigating. And if a hinge screws no longer bite into the cabinet framing, repeated tightening does more harm than good – the solution is a proper repair, not another turn of the screwdriver. Kitchen Remodeling Henderson offers free estimates in Henderson – call (888) 397-6875 to schedule a walkthrough of your kitchen and a written assessment.
See the difference
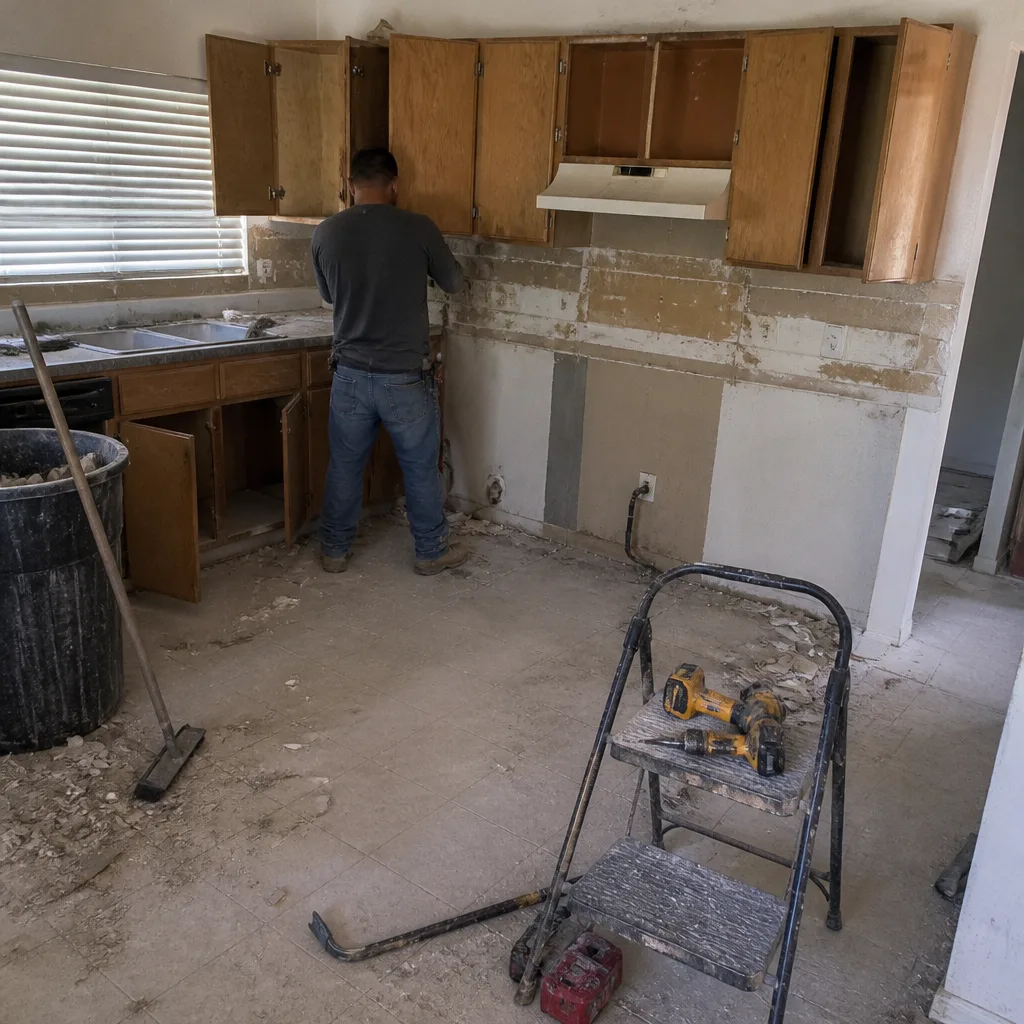 Before
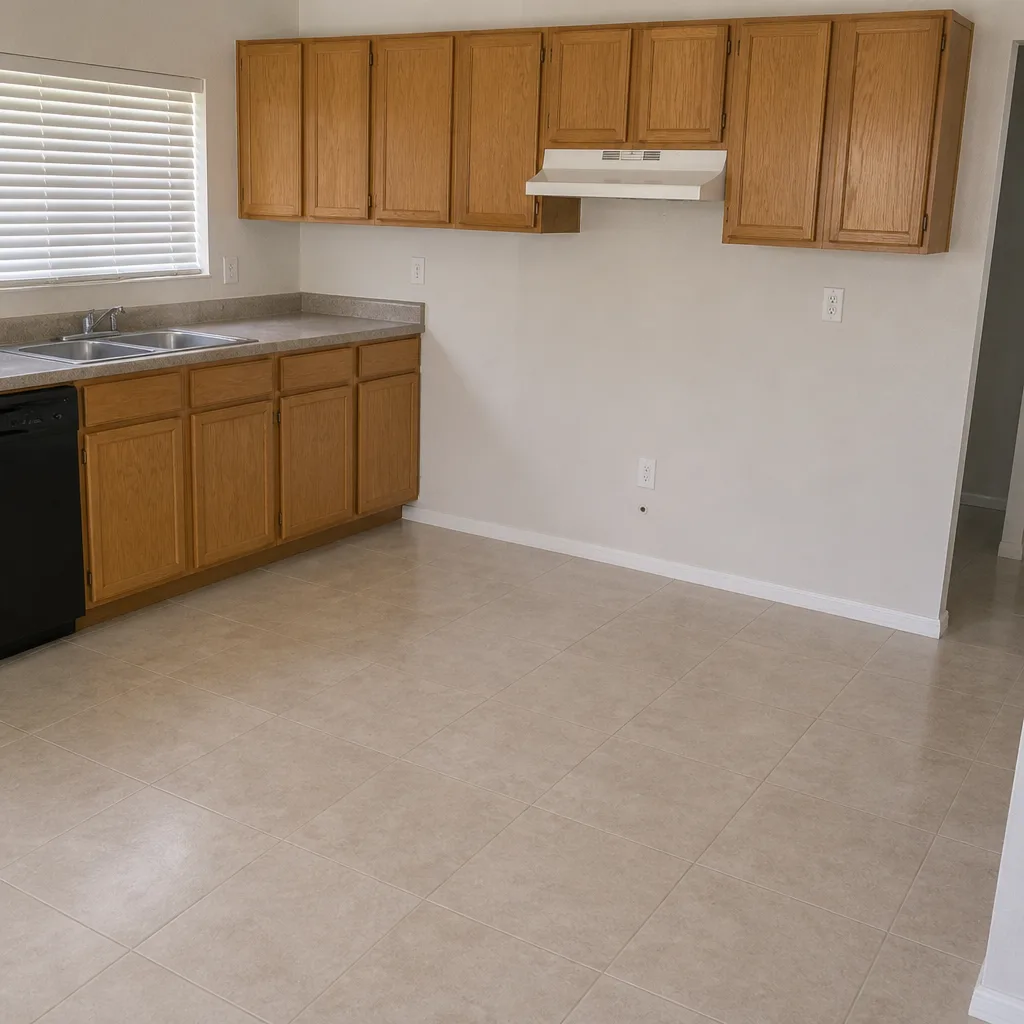 After
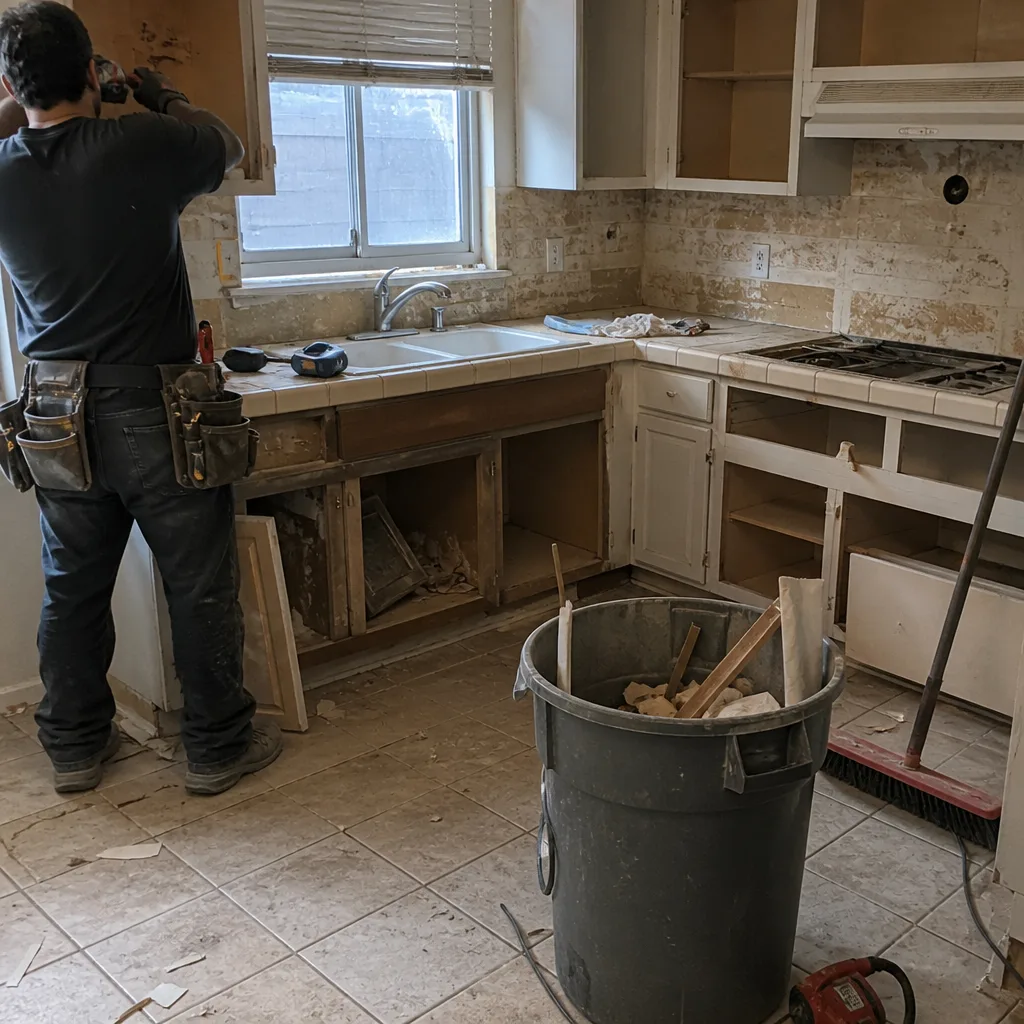 Before
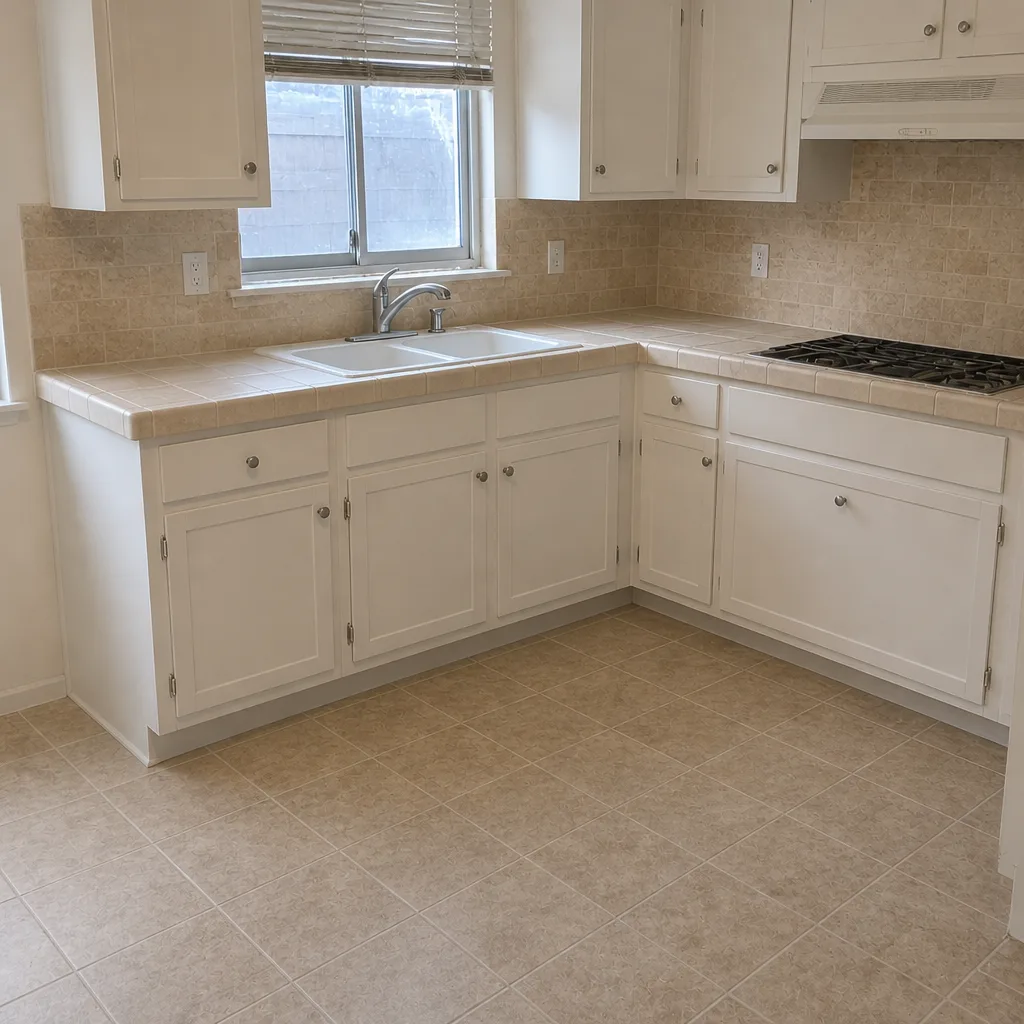 After
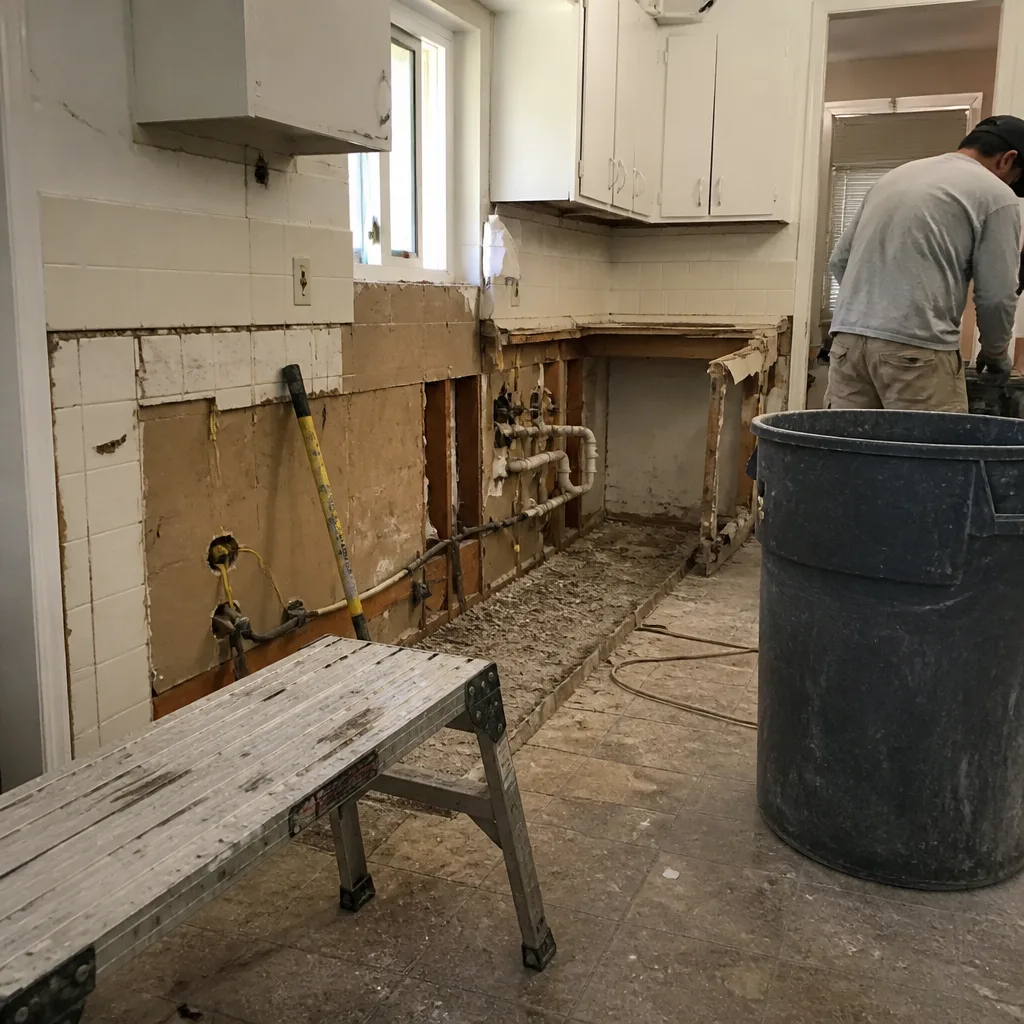 Before
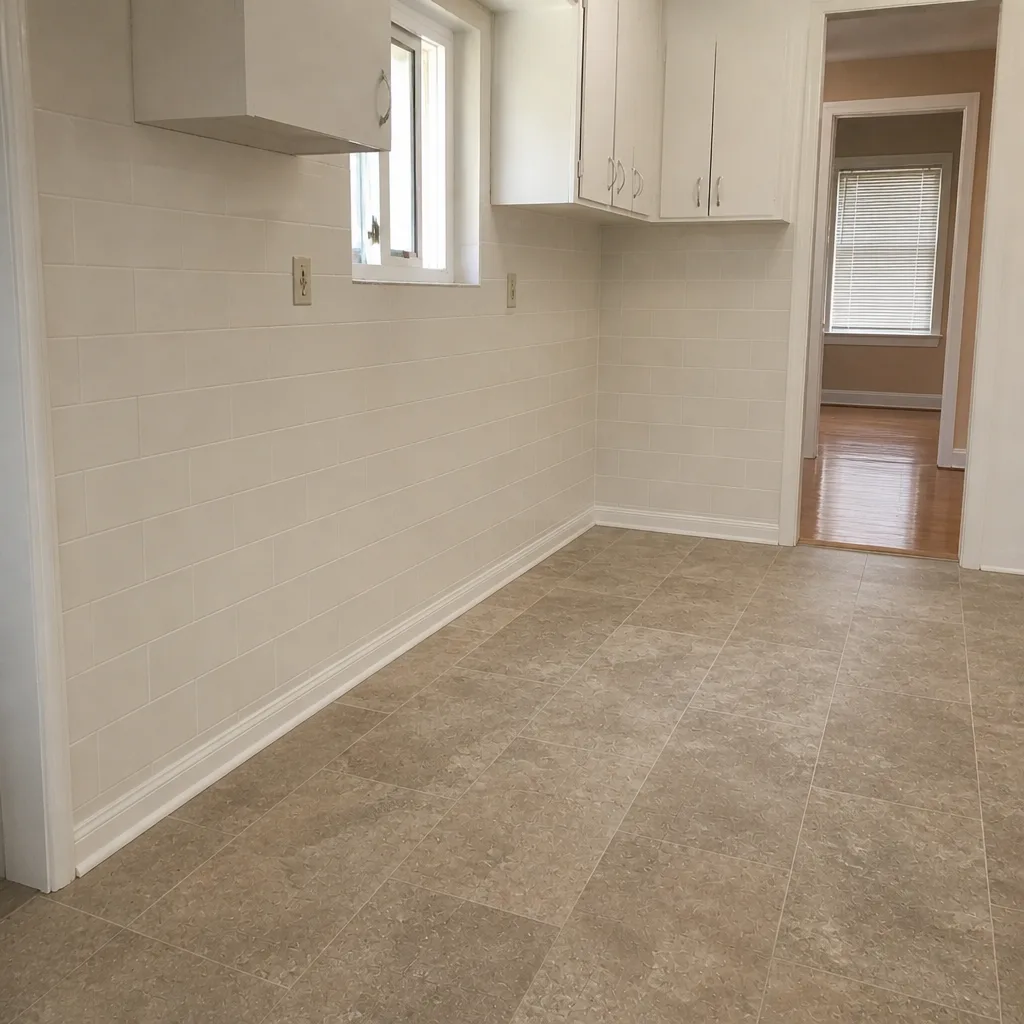 After
Frequently Asked Questions
A light monthly once-over, a deeper inspection every 3-4 months, and specific tasks on their own intervals: hinges twice a year, sink caulk every 11 months, aerators and disposal every 2-3 months. That pacing accounts for the thermal swings and hard water that make Henderson kitchens need more frequent care than the national average. Call (888) 397-6875 for a free estimate if you want a professional to set the baseline.
No. Cambria is non-porous and never needs sealing. The same goes for Silestone and Caesarstone, which are also factory-sealed. If you’re told otherwise, ask for the manufacturer’s care sheet – that’s the standard to follow. A free estimate from us includes the right care guidance for whichever surface you choose.
Twice a year is our rule for Henderson – once before summer, once before winter. The thermal cycling here expands and contracts the framing more than in a milder climate, and hinges take that movement. A quick check with a screwdriver catches a loose hinge before the door rubs or misaligns. Call (888) 397-6875 for a free estimate if you’re unsure of your hinges’ condition.
Henderson’s water runs harder than the national average, so mineral scale builds faster inside aerators, faucets, and disposals. That’s why every 2-3 months beats the annual advice you’ll find elsewhere. Adding a quarterly descale of the Moen spray head keeps the flow consistent. Need a professional look? Call (888) 397-6875 for a free estimate.
Most commonly: abrasive cleaners, moisture from an unrepaired leak, overloading drawers, and unauthorized modifications or hardware swaps. The warranty covers defects and failing hinges within its term, but a claim needs model numbers, paperwork, and a simple maintenance log. A free estimate lets us confirm the brand and line from your project records. Call (888) 397-6875.
Yes, for routine cleaning. Warm water, mild soap, and a soft cloth are the standard for Cambria, Silestone, and Caesarstone. The professional call comes when there’s a chip, a crack at a seam, or a finish issue that won’t resolve. We install all three lines and can assess the surface on a free estimate. Call (888) 397-6875 to schedule.
The Bottom Line
A remodeled kitchen in Henderson needs a calendar tuned to this climate, not a generic checklist. Cambria doesn’t need sealing, but the sink caulk line deserves a check every 11 months. Hinges get re-torqued twice a year. Aerators and the disposal get flushed every 2-3 months because the water runs hard. Match the cleaner to the material brand – Cambria, Silestone, or Caesarstone – and keep the warranty documentation filed. Do those things and the kitchen that looked new in year one still looks new in year ten. Skip them and the same kitchen starts to show its age by year eight. The difference is mostly habit, and the calendar is yours to keep. If you want a professional walkthrough to set your baseline, call (888) 397-6875 for a free estimate.
Contact
Call (888) 397-6875 for a free estimate. We answer 24/7. Fast dispatch from 7am to 7pm, Sunday through Friday. Whether you’re planning a Kitchen Remodeling Henderson project, need cabinet installation guidance, or want to talk through surface choices in the Henderson area, our team will give you a written line-item estimate and the care calendar that matches the brands you install.
Written by the team at Kitchen Remodeling Henderson.